Getting started with the Mixo form builder
Adding a form to your Mixo site is a straightforward way to engage users and collect important data. Whether it’s for a contact page, registration, or survey, Mixo makes it easy to set up useful forms. Here’s how you can add a form to your site.
Step 1: Access Your Mixo Account
Log into your Mixo account at app.mixo.io. If this is your first time on Mixo and you haven’t started a website yet, you can get started for free and generate a site using our AI Website Builder.
Step 2: Open the Site Editor
Next to your site, click “Edit Site” to visit the site editor.
Step 3: Add a New Page for Your Form
Inside the editor, click “New Page” to select from a range of page types tailored for different forms.
Choose the Form Type
- Contact Us: Ideal for capturing general inquiries.

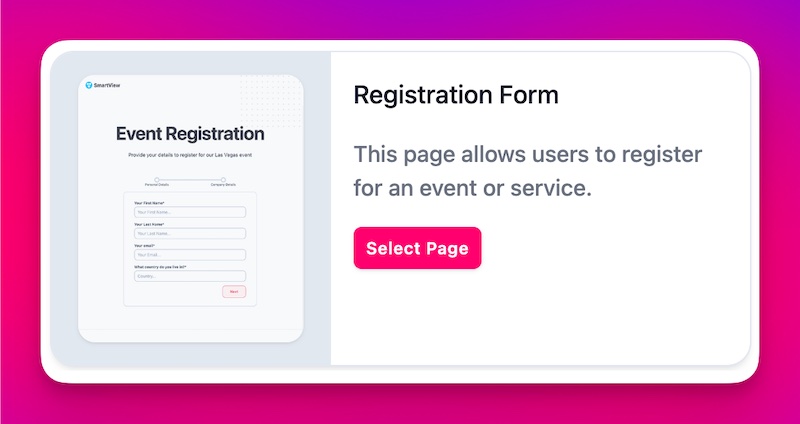
- Registration Form: Great for event RSVPs.
- Survey Form: To gather feedback on a product or service.

- Quiz Form: Fun engagement to learn more about your visitors.

Note: These are the currently released form types. More form types will be added in the future and will be available in the form selection list.
Step 4: Provide Initial Details
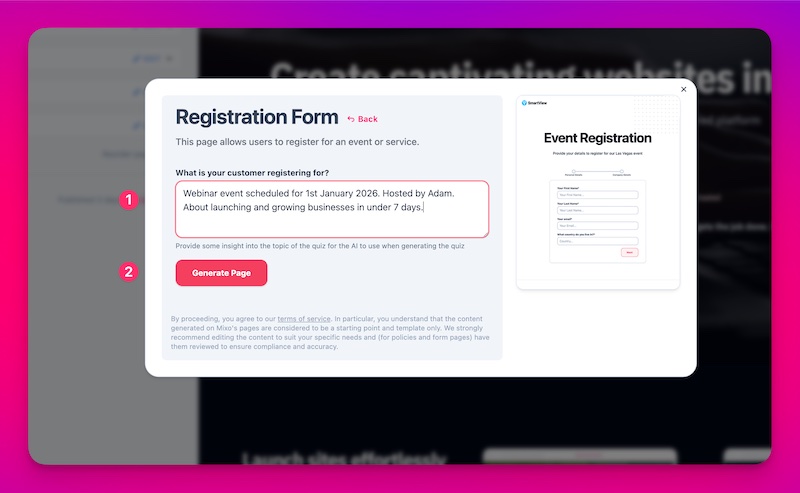
After selecting the form type, you’ll be asked to provide initial content. This helps Mixo’s AI to configure the form setup:
- Enter specific details or leave blank for general configuration.
- The AI uses the information to customize the form fields and design.
Step 5: Edit and Customize Your Form
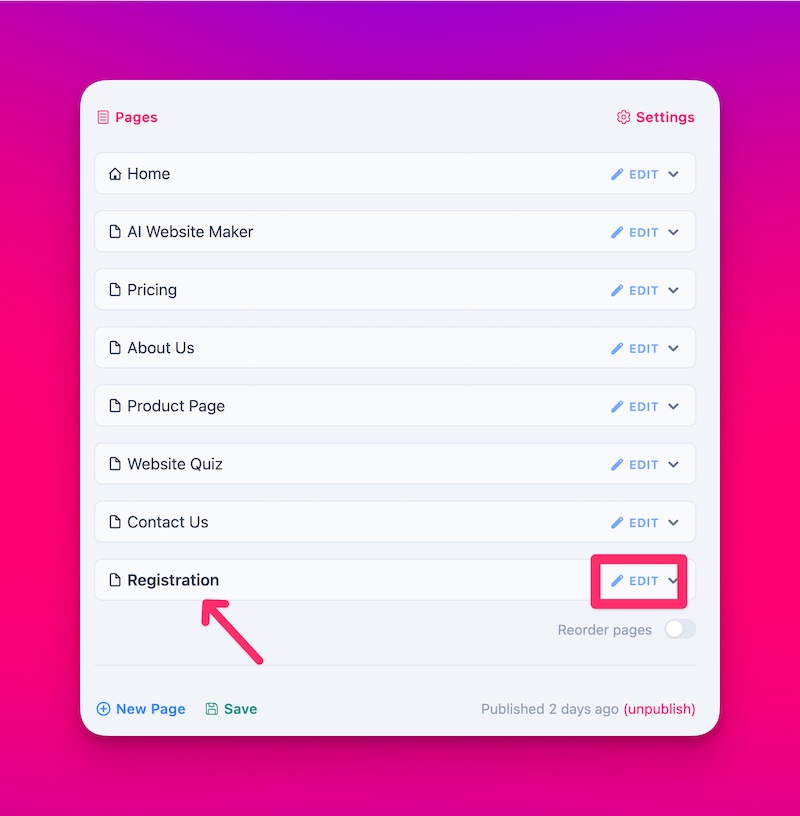
Once Mixo generates the form, you’ll see it in the list of pages. Click “Edit” next to the newly created form to make adjustments.
Adjust Fields
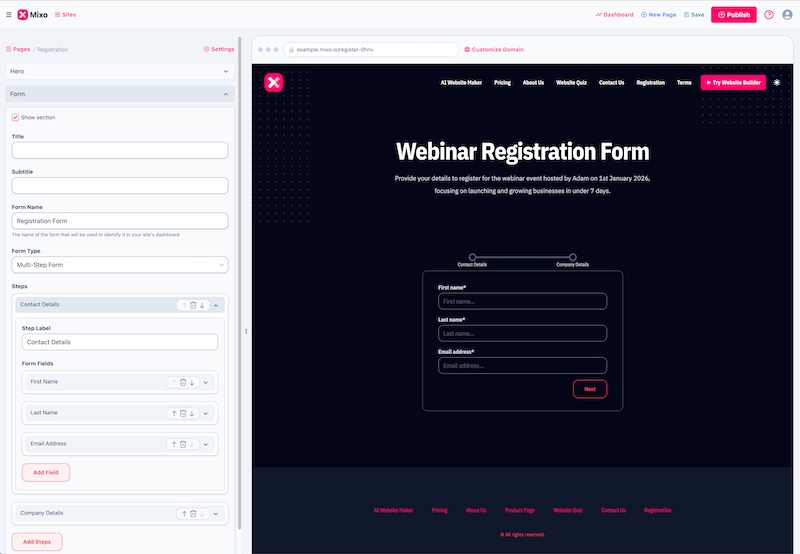
- Add, remove, or rearrange fields as required.
- Click “Add Field” to include any additional fields like text input, email, or checkboxes.
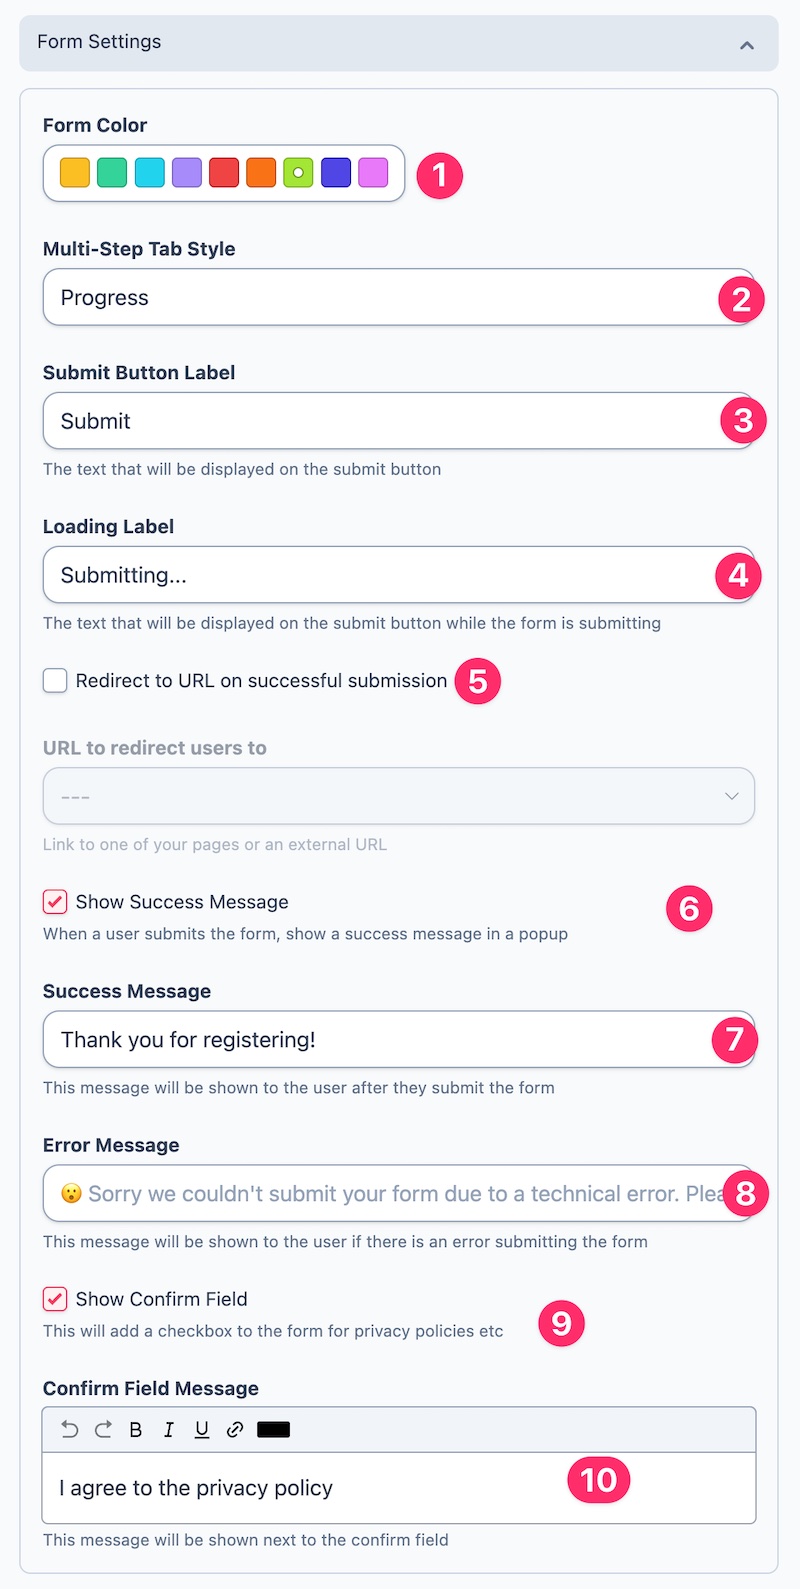
Step 6: Configure Form Settings
Scroll down to the “Form” section within the editor to customize the form settings:
- Set the appearance and behavior of your form.
- Change form color, button labels, and confirmation messages.
- Add any necessary redirects after form submission.
Step 7: Preview and Publish
Before publishing, preview the form to ensure that everything is set up correctly. Look through all aspects of the form to ensure inputs are easily understood and functional. Once satisfied, click “Publish” to make the form live.
Conclusion
Congratulations! You have successfully added a form to your Mixo site. Regularly review your form’s effectiveness by checking responses in your site’s dashboard. For further assistance, contact Mixo’s support team via feedback.mixo.io.
“I tried three other AI Website builders, and Mixo always came out on top. The interface is easy to understand. The template is simple to use, and customer service is fast, precise, and clear.”
Trusted by over 750,000 of the most innovative creators in the world.
Mixo is the trusted, easy-to-use platform chosen by everyone from solo entrepreneurs to employees at Fortune 500 companies for its reliability, quality, and cutting-edge features.